qnect-logo-trans-box-3
  • Why Qnect
    • By Role
      • Fabricator
      • Detailer
      • Estimator
      • Engineer & GC
    • By Capability
      • Connection Design
      • Connection & Material Optimizations
  • Success Stories
  • Videos
  • Blog
  • About Us
    • Team
    • Partners
    • News & Events
    • "Did You Know" Qnect Facts
    • Getting Started
    • FAQs
    • Careers @ Qnect
    • Contact Us
Sign In
Qnect-Button1-inAction.gif

Getting Started

This is the first step you take when new to qnect or if you need a refresher

  • Unit 1
  • [fa icon="caret-right"] Why Use Qnect?
  • [fa icon="caret-right"] What makes Qnect Work?
  • [fa icon="caret-right"] Can I please get Started?
  • Unit 2
  • [fa icon="caret-right"] Setting Up Standard Preferences
  • [fa icon="caret-right"] Using Buttons 1 & 2
  • [fa icon="caret-right"] How to Read Reports
  • Unit 3
  • [fa icon="caret-right"] The Listener Tool
  • [fa icon="caret-right"] Advanced Preference Settings
  • [fa icon="caret-right"] Advanced Reports
  • [fa icon="caret-right"] Estimodeling in Qnect

Taking the first step

Qnect is a powerful, intelligent and complex-but-easy software. These units and lessons are designed to help you get up-to-speed quickly and to provide you with an overview of what Qnect can do. What we have found in working with many people just like you, is that the best way to see the value of Qnect is to work with us on one of your live projects. 

Go through these lessons in the suggested order, sign up so your account is ready and then start a project. 

At anytime, contact us if you have any questions.

Thanks!


300x450-GettingStarted-U1L1

Unit 1: Lesson 1

Why use Qnect?

Schedule, efficiency, profits. These are a few themes during this introduction to Qnect lesson. You'll gain an understanding of the capabilities and benefits of using Qnect on every project with a real project example. Because many have asked, we will review the pricing, which is unique in the industry and described by many as a true "win-win." Towards the end, we will share our promise to you, the customer. To see your current project in Qnect, visit this page and you'll find instructions under the video.

Getting Started | Unit 1 Lesson 1
 
300x450-GettingStarted-U1L2

Unit 1: Lesson 2

How Qnect works?

We almost named this lesson, "what makes Qnect so awesome?" because we hear that often. This slightly shorter lesson provides some of the behind the scenes of Qnect. We go through the components that make Qnect Fast and Intelligent. For those asking about "the Cloud" we tackle that as well. We also "explain" a bit about Qnect that should prepare you to get started.

GettingStarted-Unit1-Lesson2
 
300x450-GettingStarted-U1L3

Unit 1: Lesson 3

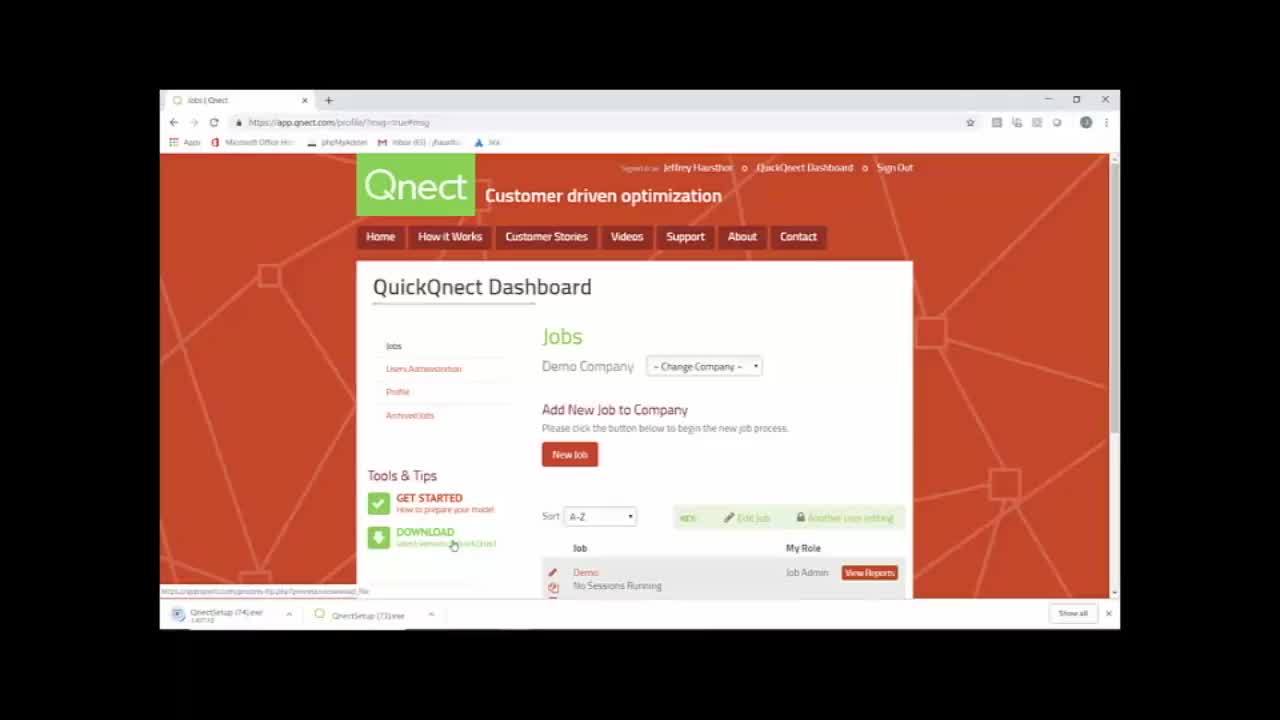
Can I please get started?

Yes, we'll keep this video as short and thorough as we can. We do recommend that before watching this video, you Sign Up to start your account setup process. As we work in the background on your account, you will learn how to download the Qnect app to where you'll find it in your toolbar, and some basic setup. Nothing too deep. 

Sign Up

Getting Started Unit 1 Lesson 3
 
300x450-GettingStarted-U2L1

Unit 2: Lesson 1

Setting up Standard Job Preferences

Now you have an account. You can sign into your account. Most importantly, you can begin connecting your projects but first, you have set up some standard job preferences. We're here to help along the way of course so consider this an overview. When the time comes for your first project, we'll walk you through. After your first few projects, most people tend to copy past preferences, reducing time considerably.  

Unit 2 Lesson 1...
 
300x450-GettingStarted-U2L2

Unit 2: Lesson 2

Using Button 1 & Button 2

With the standard preferences set you're ready to export model data and then import engineered Qnections. Select all or part of the model and click Button 1. Give it a name and submit. Once completed, you'll use Button 2. It's pretty much that easy to start. Watch the process in this video and get some of the "what if" questions answered before watching the next lesson.

Unit 2 Lesson 2...
 
Getting Started Series BONUS

BONUS: 

We saw how to set up Setting up Standard Job Preferences in Unit 2: Lesson 1. Then we learned what Button 1 and Button 2 do, export and import the connection data in Unit 2: Lesson 2 Now as a BONUS, we learn how to Locate and position shear place as well as define spandrels for full depth stiffeners, which is a combination of what you learned in the previous two lessons.

Getting Started Unit 2 - BONUS
 
300x450-GettingStarted-U2L3

Unit 2: Lesson 3

How to Read Reports

Keeping to the schedule means communicating with others on the project. Qnect provides detailed yet easy to understand reports. In this lesson, we review the three most important reports:

  • Connection Reports SAMPLE
  • No Connect Reports SAMPLE
  • Beam Web Doubler Report SAMPLE
Unit 2 Lesson 3 - Reading Reports
 
300x450-GettingStarted-U3L1

Unit 3: Lesson 1

How to use the Listener Tool

With Qnect’s Listener, revisions have never been easier or safer. Simply put, the Listener listens. It listens for changes being made in the model. When changes are made, you'll be assured that accurate engineering will be applied to all revisions. In this lesson, you'll see the Listener in action as well as revision tracking. This is one tool that keeps your schedule on target.

Unit 3 Lesson 1 - Listener Tool...
 
300x450-GettingStarted-U3L2

Unit 3: Lesson 2

Setting up Advanced Preference Settings

Now you're getting the hang of it, right? If not, no worries. We'll get you through your projects; that's our promise. At the same time, you want to know just how much you can do with Qnect. In this lesson, you'll go beyond the preference settings reviewed in Unit 2: Lesson 1. "Not complicated but a bit more complex" is how some have described Advance Preference Settings.

Unit 3 Lesson 2 Adv Pref...
 
300x450-GettingStarted-U3L3

Unit 3: Lesson 3

Working with Advanced Reports

We learned in Unit 2: Lesson 3 "How to read reports" and we focused on three common reports. This lesson introduces several additional "advanced" reports and dives a bit deeper into the previous reports. Please keep in mind that Qnect is packed with data and because of that we're committed to making sure that that data produces results for you and will not bog you down.

Unit 3 Lesson 3
 
300x450-GettingStarted-U3L4

Unit 3: Lesson 4

How to Estimodel using Qnect

For this lesson, we share with you a 25-minute recorded webinar, where you will learn how-to:

  • Build a stick model appropriate for estimating 
  • Connect the model while optimizing to reduce costs 
  • Transfer the data to your MIS tools to increase profits

Typical results include reduced costs, reduced work hours and increased profits. 

OnDemand-EstimodelingWebinar-Aug2018
 

About Us

Qnect, an intelligent, cloud-based connection app gives fabricators, detailers and engineers fast and flexible connections with significant cost and schedule savings. In minutes, users can connect most steel buildings without capital cost and with minimal initial training. Two important benefits of Qnect include: Preference Optimization and Bolt Optimization.

Learn More [fa icon="long-arrow-right"]

Quick Links

  • [fa icon="caret-right"] Start Now
  • [fa icon="caret-right"] Customers
  • [fa icon="caret-right"] FAQ
  • [fa icon="caret-right"] Pricing
  • [fa icon="caret-right"] Terms & Usage
  • [fa icon="caret-right"] Privacy

Contact Us

[fa icon="phone"]  (413) 387-4375

[fa icon="envelope"]  Marketing@Qnect.com

[fa icon="home"]  245 Russell St., Hadley MA

Copyright 2021 Qnect. All rights reserved.
[fa icon="chevron-up"]
Qnect Logo
  • Why Qnect
    • By Role
      • Fabricator
      • Detailer
      • Estimator
      • Engineer & GC
    • By Capability
      • Connection Design
      • Connection & Material Optimizations
  • Success Stories
  • Videos
  • Blog
  • About Us
    • Team
    • Partners
    • News & Events
    • "Did You Know" Qnect Facts
    • Getting Started
    • FAQs
    • Careers @ Qnect
    • Contact Us
Sign In